

Get your first labeled dataset
Label 10 support tickets by intent end-to-end and download the finished file — your first run, start to finish.
In about 15 minutes you will label 10 customer support tickets by intent as a question, a complaint, or praise, then download the labeled dataset. Describe the task in plain English. The agent builds the pipeline — the sequence of steps inside your project that does the labeling — and you launch it without configuring anything by hand. Use the supplied data and prompt exactly as shown.
Before you start
Section titled “Before you start”You need:
- An account you can sign in to.
- A team with a funded balance. This run itself costs nothing: it labels by simple rules, with no experts and no language model, so its cost breakdown comes to zero — you will see that in the cost window before you launch. A run still cannot deploy on an empty balance, so any balance of at least $0.01 covers it.
- The demo dataset below, saved to your computer.
Save these 10 support tickets as a file named support-tickets.json:
[ { "ticket_text": "Hi, how do I reset my password? I can't find the option anywhere." }, { "ticket_text": "This is the third time my order arrived damaged. I'm furious." }, { "ticket_text": "Just wanted to say your support team was incredibly helpful today, thank you!" }, { "ticket_text": "What are your business hours on weekends?" }, { "ticket_text": "The app keeps crashing every time I open the checkout page. Please fix this." }, { "ticket_text": "Amazing product, it has saved me hours every week. Great job!" }, { "ticket_text": "Can I change the shipping address after placing an order?" }, { "ticket_text": "I was charged twice for the same subscription and nobody is responding." }, { "ticket_text": "Do you offer student discounts?" }, { "ticket_text": "The new dashboard update is fantastic, much easier to use now." }]Each line is one ticket. The text lives in a field called ticket_text. You will refer to that field by name when you describe the task.
Step 1 — Sign in
Section titled “Step 1 — Sign in”Sign in with your account. A new account lands directly in the pipelines product these docs cover, on your team’s project list. With more than one team, the platform picks one for you automatically. There is no team-choosing screen.
If you land in the older workspace instead (you used the previous version of the product before), find the Develop your project using pipelines card, badged new in the bottom-left sidebar and click its black Switch to v2 button.
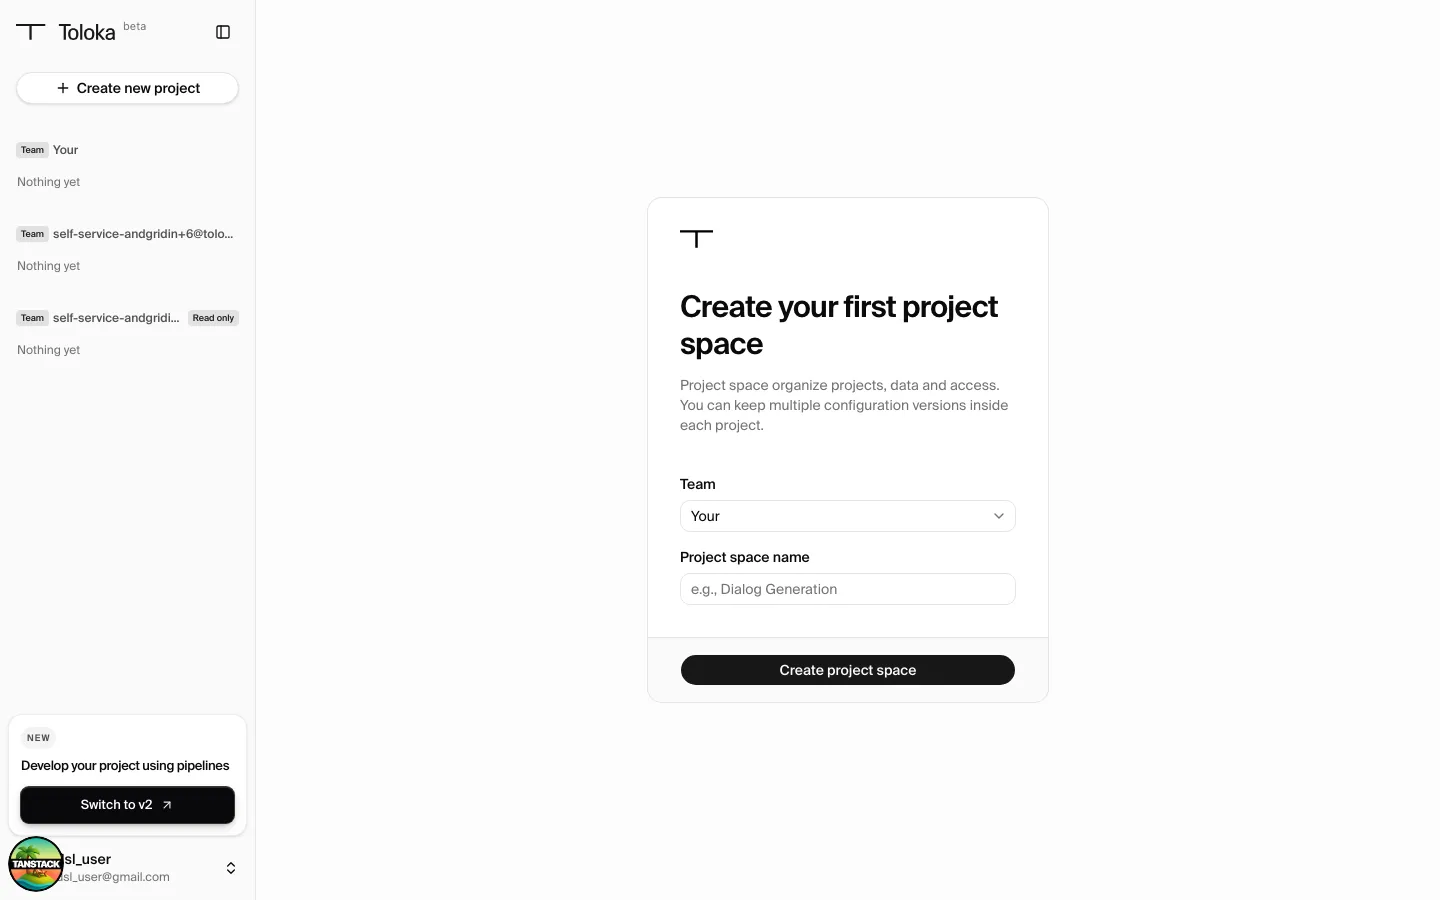
Either way, you end up on a team’s project list. The next step starts there.
Step 2 — Start a new project
Section titled “Step 2 — Start a new project”Click + Project at the top-right of the Projects page. A project holds your data, your chat with the agent, and the pipeline the agent builds inside it. A screen titled What Do You Want to Do? opens with a message box reading Send a message…, an Add Datasets, Presentations, Examples attach button, and a Continue button. This is where you tell the agent your task.
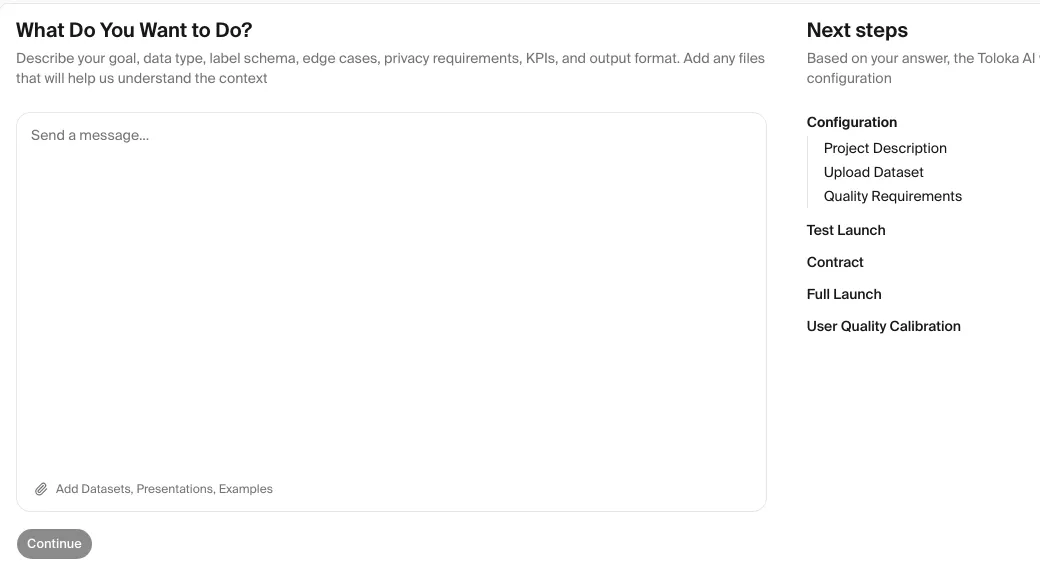
Step 3 — Describe the task and attach the data
Section titled “Step 3 — Describe the task and attach the data”Use Add Datasets, Presentations, Examples to attach support-tickets.json, then type this task into the message box exactly:
Label each support ticket in the attached file by its intent. Read the
ticket_textfield and assign one label:question,complaint, orpraise. Use simple rules, not a language model — no API key needed. Add the label as a new field calledintent.
Click Continue to submit — pressing Enter in the box only adds a line break.
Your project opens, and the agent starts building its pipeline from your description. From here you talk to the agent in the chat on the project page. It works through the task and may ask you a clarifying question. If it asks how to do the labeling, confirm you want simple rules, no language model and no API key. This keeps the lesson self-contained and free of outside setup.
Step 4 — Let the self-check pass
Section titled “Step 4 — Let the self-check pass”After the agent builds the pipeline, it runs a self-check, an automatic test that the pipeline is set up correctly. The self-check confirms the setup is valid without labeling any real data. When it finishes, the agent shows a Validation section with lines such as pipeline_graph.validate: valid, 0 errors, 0 warnings. and its automated checks configured and passing, each check marked with a green checkmark.
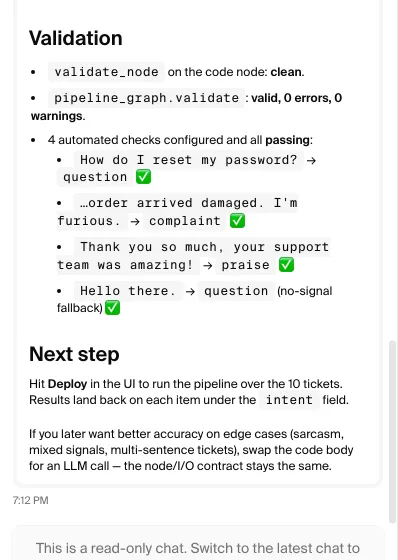
Do not move on past a failing check. A pipeline that cannot pass its own self-check is set up wrong, and a run launched in that state produces broken or unusable labels. If a check does not pass, send the agent this message and let it try again:
The self-check did not pass. Please fix the pipeline so the checks pass, still using simple rules and no language model.
Step 5 — Deploy the pipeline
Section titled “Step 5 — Deploy the pipeline”Open the Pipeline tab (the toggle sits in the top-right of the pipeline view, showing only Pipeline until a deploy finishes and the Items tab appears) and click the black Deploy button in the bottom toolbar, next to the ⋮ More pipeline actions menu. Before a deploy that menu holds only Export, which downloads the pipeline’s configuration rather than any results.
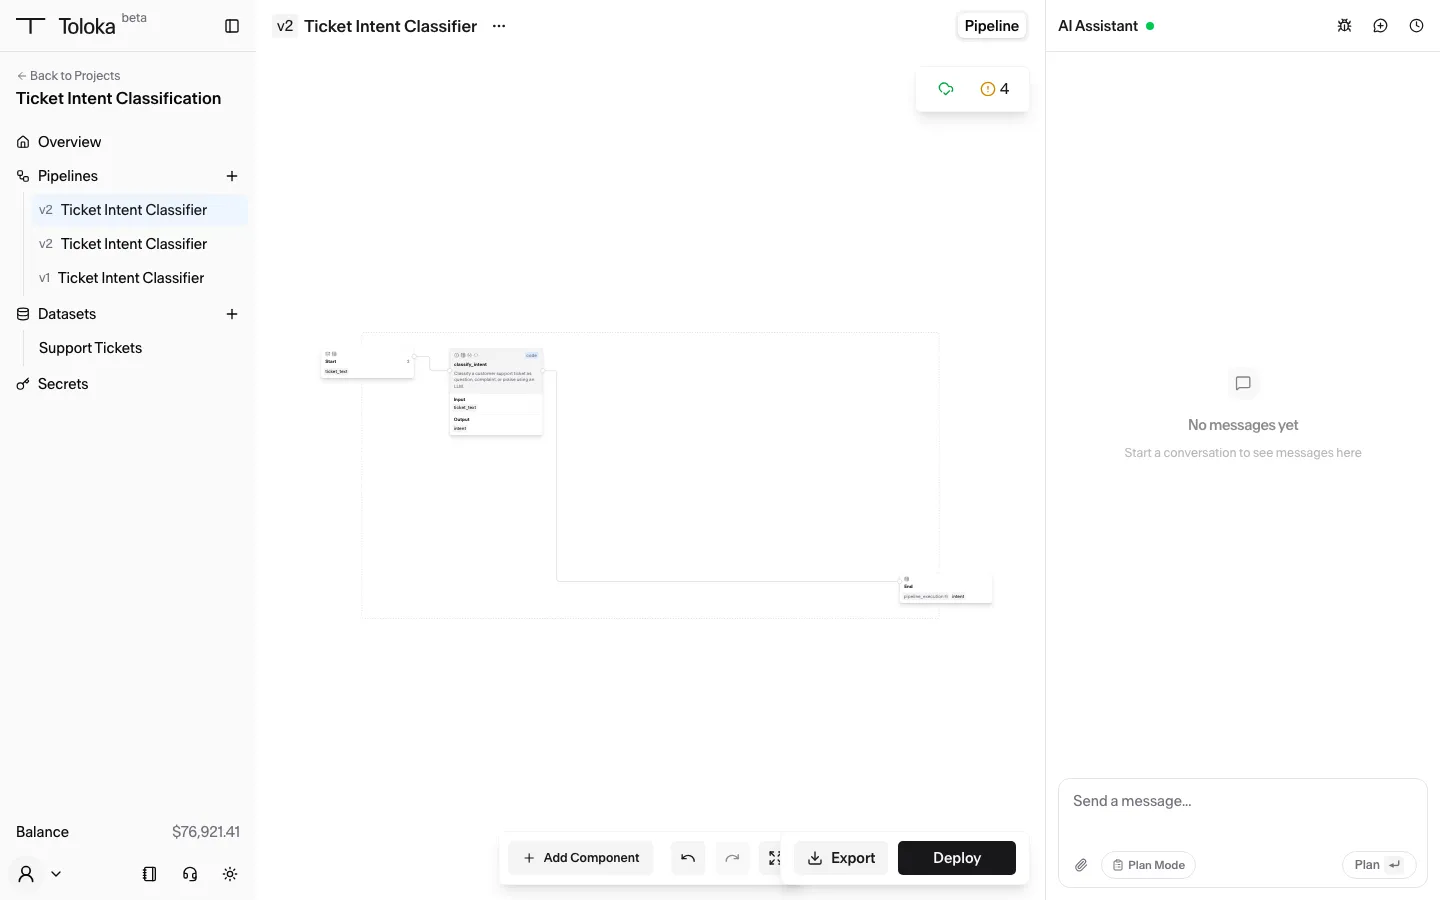
A window titled Cost breakdown (forecast) opens, showing the cost for this run. Tick the consent checkbox (I have reviewed all project settings and the cost breakdown…), then click Confirm and deploy. The button stays disabled until the box is ticked.

This run is free because 10 items are labeled by simple rules, with no human reviewers and no language model. The cost breakdown comes to zero and the run finishes quickly.
Step 6 — Watch it finish
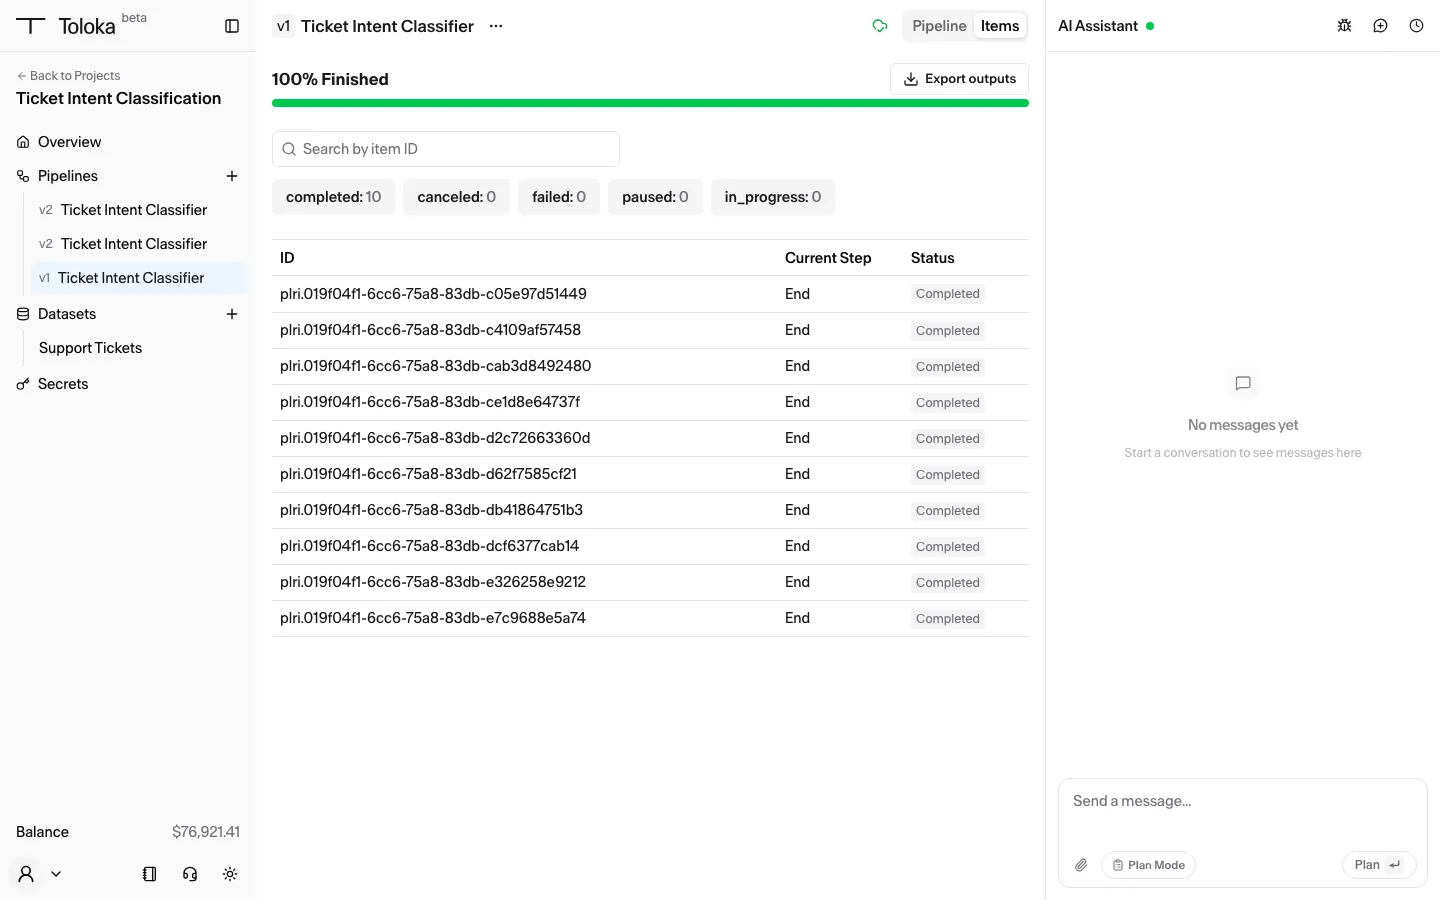
Section titled “Step 6 — Watch it finish”Open the Items tab to see the progress of every item in your dataset. The run is done when a green 100% Finished bar appears and the counter chips read completed: 10 / canceled: 0 / failed: 0 / paused: 0 / in_progress: 0. Wait for completed: 10. Every ticket is then labeled. The other chips count states this run should not hit — Resume or cancel a run explains paused and canceled items, and Export your labeled results lists every status an item can end in.
Step 7 — Export and download your labeled file
Section titled “Step 7 — Export and download your labeled file”Click Export outputs in the top-right of the Items tab to open the Exports popover, then click New export. A completed row appears with a download icon. Click it to download your labeled file.
Open the file: one row per ticket, each with its position (index), its status, the original ticket under input, and the label your pipeline produced under output. For example:
[ { "index": 1, "status": "completed", "input": { "ticket_text": "Hi, how do I reset my password? I can't find the option anywhere." }, "output": { "intent": "question" } }, { "index": 2, "status": "completed", "input": { "ticket_text": "This is the third time my order arrived damaged. I'm furious." }, "output": { "intent": "complaint" } }, { "index": 3, "status": "completed", "input": { "ticket_text": "Just wanted to say your support team was incredibly helpful today, thank you!" }, "output": { "intent": "praise" } }]The label sits under output in a field named intent, the field name you asked for in your task. That downloaded file is your first labeled dataset.
Next steps
Section titled “Next steps”This lesson used a node that labels by simple rules, with no expert time or language model. It proves the workflow. The product’s real labeling paths are expert labeling and LLM labeling with automated quality review.
- How the platform works explains how the pieces fit together.
- Train your first model trains a model on the same 10 tickets from the command line and downloads the result.
- Pipeline nodes reference lists every kind of node.
- Label with an LLM instead of experts covers the LLM labeling path with automated quality review.
- Export your labeled results returns to your downloaded file.