

Create and manage datasets
Create a dataset, load items from a JSON file, turn the raw upload into fields, append more items, browse and filter, export fields, and rename or hide — from the dataset page or by asking the agent.
A dataset holds the items a pipeline labels. You manage one from two places: its own page, reached from the Datasets section of the project sidebar, or by asking the agent in chat. This page covers creating a dataset, loading items from a file, turning the raw upload into fields, appending more items, browsing and filtering, exporting fields to a file, and renaming or hiding a dataset. For what a field, an item, and a value are, see Fields and data.
Before you start
Section titled “Before you start”You need:
- A project. A dataset lives inside a project and can feed any pipeline in it. Open a project from your project list.
- Your items in a JSON or CSV file, if you want to add data now. The next section gives the exact shape.
Create a dataset
Section titled “Create a dataset”Two paths create a dataset:
- On the dataset page. In the project sidebar, open the Datasets section and click the plus button (tooltip Create dataset). The dataset opens with a placeholder name (New Dataset, numbered if one already exists), and its page is the upload zone. The first file you upload renames the dataset to that file’s name.
- Through the agent. Attach a JSON or CSV file in chat and ask the agent to build a dataset from it. The agent creates the dataset and loads the file in one step.
An empty dataset page is titled Add File. Drag a file onto it, or click Select file… to choose one. The zone accepts JSON and CSV, chosen by the file extension; anything else is refused with Please upload a JSON or CSV file.
What the file must look like
Section titled “What the file must look like”A JSON file is an array of objects, with one object per item:
[ { "ticket_text": "Hi, how do I reset my password? I can't find the option anywhere." }, { "ticket_text": "This is the third time my order arrived damaged. I'm furious." }, { "ticket_text": "Just wanted to say your support team was incredibly helpful, thank you!" }]The upload screen states three limits:
- Up to 1024 MB per file.
- Up to 1024 KB per item.
- Up to 150,000 items in a dataset. The cap counts everything the dataset holds, across the first upload and every append — the screen says “items in file”, but the limit is per dataset.
A CSV file starts with a header row, and each later row becomes one item keyed by those headers. Headers must be present, non-empty, and unique, and every row must have as many values as the header has columns.
Each item is stored whole in a built-in field named uploaded, which holds its raw value. The fields you actually filter and label on come from that raw value in the next section.
An upload is all-or-nothing: a file with any invalid item adds nothing to the dataset, and the upload lists up to 50 of the problems for you to fix. A file that is neither JSON nor CSV, is empty, is over 1024 MB, has a non-array JSON root, or holds an item over 1 MB is rejected the same way. The one exception: a valid file that overflows the 150,000-item cap is imported up to the cap, and the upload reports Dataset item cap reached; remaining rows were not imported. The exact messages, with their fixes, are on the errors reference.
Turn the raw upload into fields
Section titled “Turn the raw upload into fields”The platform reads the items during upload and automatically proposes fields for them. When the first upload finishes, the Infer Fields modal opens on its own, titled Create fields from upload file.
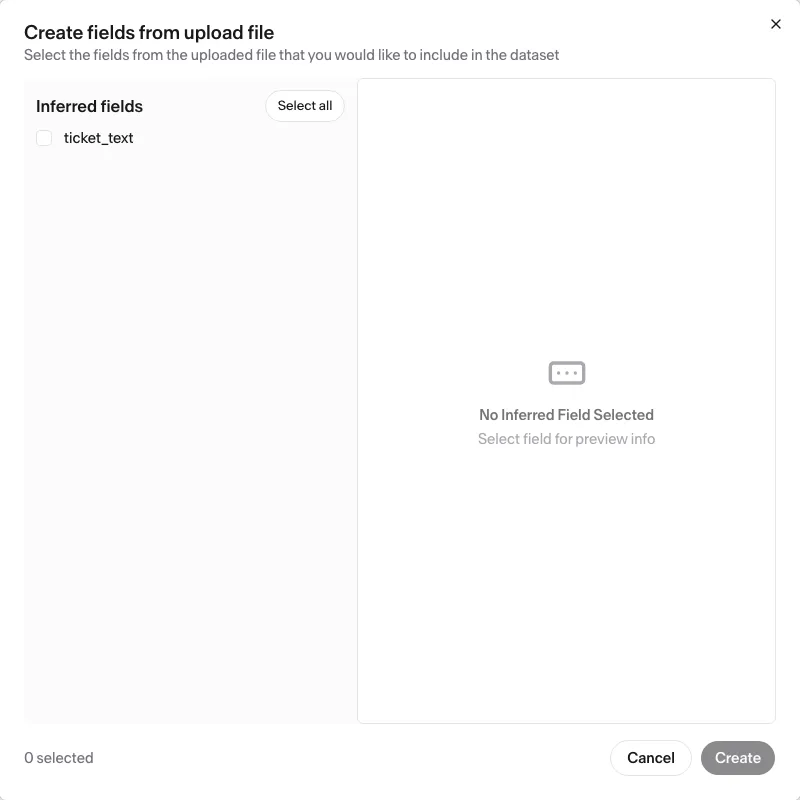
The modal lists the proposed fields with a checkbox each and a Select all control. Tick the ones you want and click Create. Each one becomes a field that reads its value from uploaded. The columns fill in afterward. Values populate in the background, so a large dataset’s fields appear gradually. Names already taken in the dataset show struck through in the modal. You can reopen the modal any time with the Infer Fields button. A dataset holds at most 500 fields, and one field holds at most 500 recorded values per item.
The platform skips an item when its raw value has nothing at the field’s location or holds a value that does not fit the field’s type. The item does not fail: it keeps its row and its uploaded value, and has no value for that field. Every later upload re-runs these derivations on the new items automatically, so appended items pick up the same fields.
Append more items
Section titled “Append more items”Once a dataset has one validated upload, an Append items button appears next to Infer Fields. It opens the same upload zone, titled Append items to dataset. An appended file goes through the same validation as the first. One upload runs at a time per dataset, and a truncated file that stops mid-item fails the upload.
Appended items continue the same numbering: item indexes start at 1 and never reset, so a new upload’s items take the next numbers in sequence.
The agent appends to an existing dataset the same way, from a file you attach in chat.
Browse and filter
Section titled “Browse and filter”The dataset page lists its items under an Items (N) header showing the total count, 100 items per page, with Prev and Next. The table has one column per field, plus an index column. Click a column’s field name to see its JSON schema, its description, its field ID, and its largest stored revision.
A cell shows a preview truncated at 120 characters. A value too large to preview shows a view value link and loads when you click it. A field with more than one recorded value is marked (N rev); opening it lists every value, latest first.
Each column has a funnel filter. The Start node uses the same filter to pick which items a run launches. Point it at a location in the value under JSONPath, choose = or ≠ under Operator, and enter a Value; ≠ with an empty value matches every item that has a value at all. Latest revision only narrows the match to each item’s newest recorded value. You can also filter by the source under Created by, or tick No revision for this field for items that have no value for it. Apply runs the filter and Clear removes it. For the launch-time meaning of these filters, see the Start node’s item filter.
Value filtering is unavailable for a field whose largest value is over 32 KB. A notice says so, and you can still filter that field by source or by missing value.
Export fields to file
Section titled “Export fields to file”The Export fields to file section on the dataset page exports the dataset’s own fields. Pick the fields to include and click Export selected fields. The platform generates a JSON file in the background. When its badge turns to completed, use the Download link on that export’s row. Exporting runs from the dataset page.
This exports the fields that a dataset holds. The agent can export too, writing the fields you name to a file in its workspace. To export a pipeline run’s results, use the run’s Items tab instead. See Export your labeled results.
Rename or hide a dataset
Section titled “Rename or hide a dataset”The ⋯ menu on the dataset header has Rename dataset and Hide Dataset — on an already-hidden dataset the second item reads Show Dataset, and a hidden badge sits next to the name. Renaming opens an Edit dataset name dialog. The agent can rename a dataset too.
Hiding a dataset removes it from the sidebar’s Datasets list. The dataset still exists and still feeds any pipeline bound to it, but it becomes invisible to the agent: every agent operation on a hidden dataset fails until you unhide it. To see hidden datasets again, turn on Show hidden datasets (the eye toggle on the Datasets section). Hiding is a dataset-page action. The agent cannot hide a dataset.
What this does not do
Section titled “What this does not do”- No hand-editing of item values. The table is read-only, and nothing changes a value an item already holds. A new value arrives from an upload, a field derivation, a pipeline run writing its results back, or the agent importing values from a file into fields that are still empty — already-populated pairs are skipped.
- No deleting items or datasets. You can hide a dataset, but nothing removes a dataset or an individual item.
- Any pipeline in the project can read a dataset. The Start node is where a pipeline binds a dataset and picks which items a run launches.
Related
Section titled “Related”- Fields and data — the field, item, and value model the dataset’s columns follow
- Start and End nodes — how a pipeline binds a dataset and filters items at launch
- Fine-tune a model — uploading labeled conversations for supervised fine-tuning
- Compress a prompt with gisting — uploading examples for gisting
- Label a large dataset in batches — uploading each batch as its own dataset
- Get your first labeled dataset — the attach-and-build flow end to end
- Errors and how to fix them — every upload, append, and filter error verbatim